
10 Exam Management
The EXAMS section shows the list of all accepted exams, but it is possible to limit the list according to the preferred period (last month, last 3 months, last year, all or from a particular date).
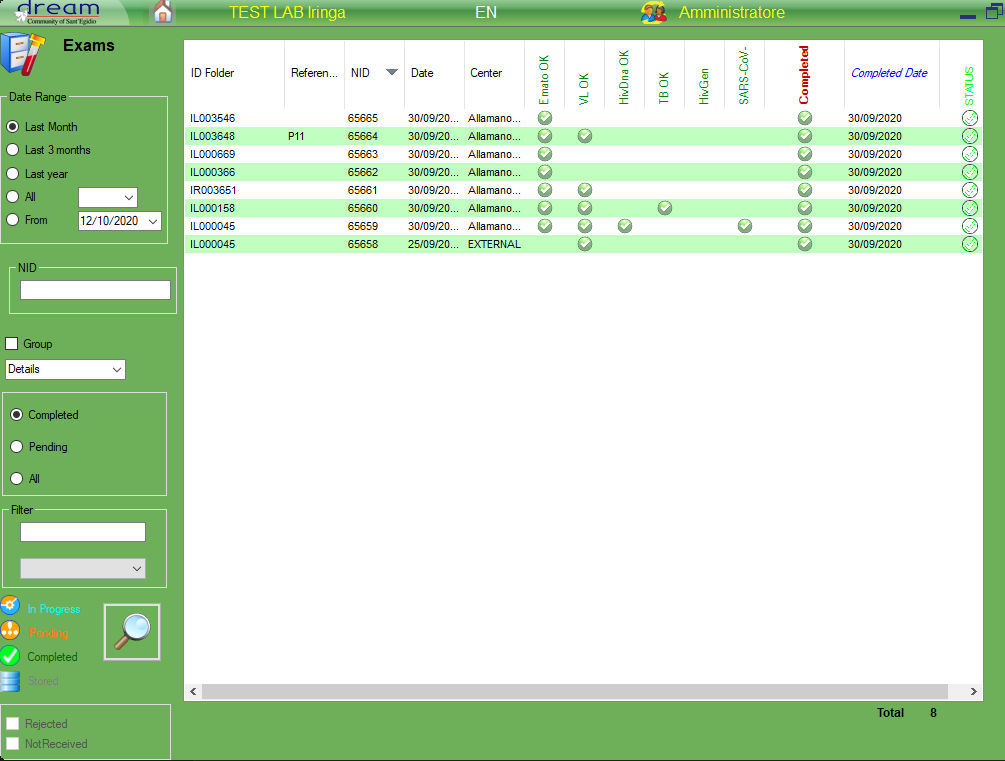
By double clicking on the line that interests us, we will be able to open the report linked to that NID, to enter the results or to check it and eventually give the OK to the signature or sign and print the exam.

The exam’s page detail, identified by a specific NID, is divided into different sections corresponding to the different types of exams: Clinical chemistry, hemogram, molecular tests, etc., accessible through the corresponding tabs.

Let’s see in detail, for example, the section relating to Clinical Chemistry
At the top (1), for all sections, we will always see the data relating to the patient and the origin of the selected sample, with information relating to the date and time of collection and reception.
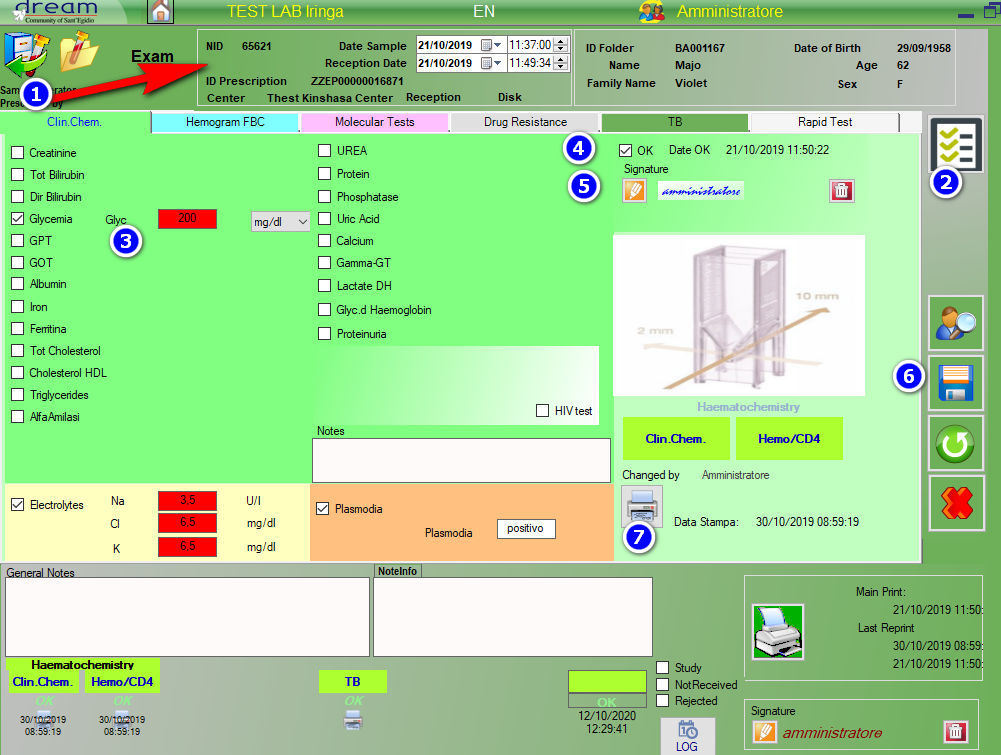
It is also possible via button (2) to view additional patient data.
In the example in the figure, a blood sugar test (3), electrolytes and plasmodium was required.
Note that the software shows the field to enter the result and to choose the unit of measurement exclusively for the required exams.
It’s possible to assign for every exam a value by checking the label
The OK field (4) is required to validate the results entered and prepare the exam for signature by the manager which is affixed via the orange button (5).
The OK checkbox is enable only when one of the exams will be checked, then it will be possible to sign it, unchecking the OK automatically delete the signature
It is necessary to save the exam using the save button (6) for each step (OK, signature) in order to memorize each step performed.
Every section’s state is showed on the bottom left